|
MOLD MAKING
|
|||||||||||
|
Making a mold
The plug or buck is required first to be able to make a mold. This will be an original art part that is to be copied. These days very accurate patterns can be laser cut or machined to very small tolerances by computer, then surface finished to make a high quality plug. Such method is of course expensive.
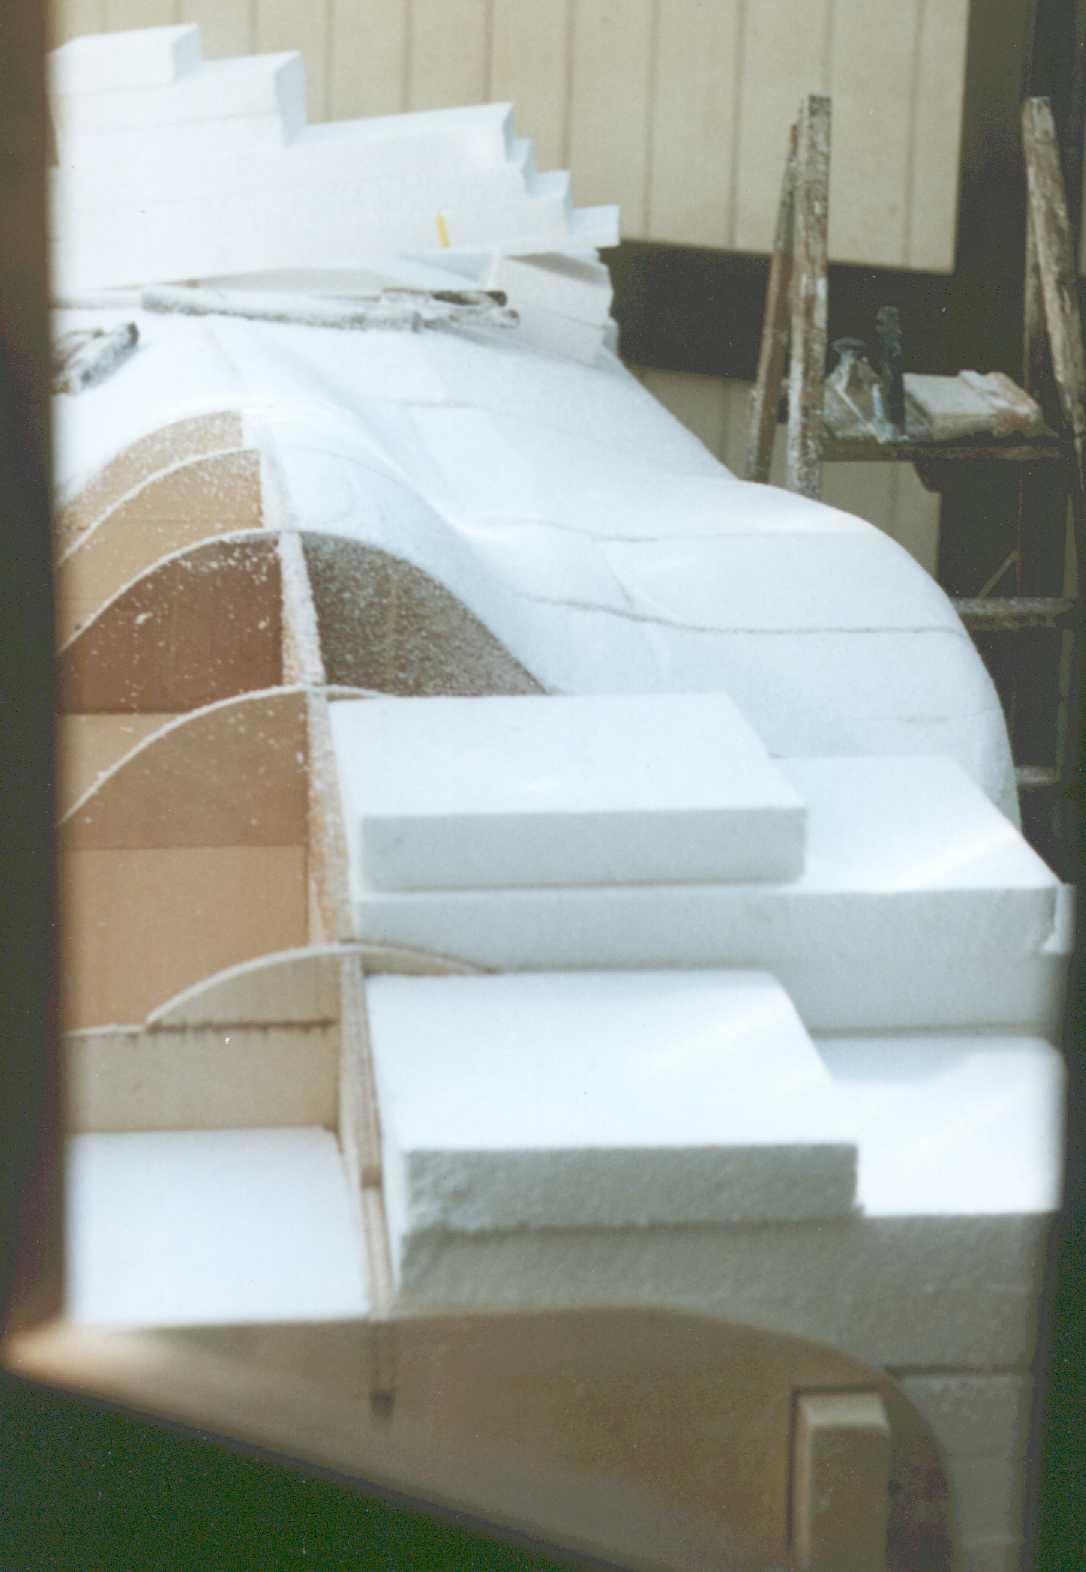
The body for the original Bluebird Electric 2, shown on this page was made by hand, with plywood templates cut by hand using ordinary saws and a jigsaw. The plywood templates are taken from a CAD drawing and the measurements are plotted (lofted) by hand directly onto the plywood. Once cut the templates are fixed at regular intervals along longitudinal timbers. The templates are the size of the finished body, minus the thickness of the GRP body. So you have to lay up with some precision.
You can see from the photographs that the plywood templates are then in-filled with polystyrene, after which they are shaped by hand using the same body files used for shaping polyester body filler, as when repairing car bodywork. You can fine surface finish with 40 grit production paper, for a surprisingly accurate shape.
The buck or plug, however it is produced must be waxed with several coats of mold release wax and polished in between coats, before the mold may be made. Depending on the desired surface, PVA (Poly Vinyl Acetate) may be sprayed on as an additional mold release agent. However this will reduce the smoothness of the molds finish.
Hand made plug or buck using foam infill
Once the plug has its release agent applied, gelcoat is sprayed or brushed onto the plug. Gelcoat is a pigmented resin without reinforcement. Tooling gelcoat is used for a harder more durable finish.
Molds are usually made from the same fiberglass and polyester resin that the final part is made from. A mold should be 5 times thicker than the part being made as a rule of thumb. Thus, if a part is made from two layers of 1.5 ounce mat, then the mold should be 10 layers of 1.5 ounce mat. Hence, many layers of fiberglass will be applied, and resin added bonding the fiberglass layers together.
Once the final layers of fiberglass are applied to the mold and allowed to set up, wedges are driven between the plug and the mold to separated the two. When released you have a negative image of the original part, or female mold.
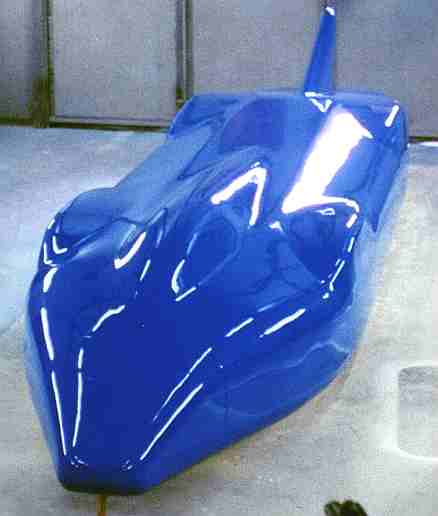
Finished plug from which to make a mould
Making a part
The making of a part is the reverse of making a mold. The mold is waxed, and PVA is applied if desired. The mold will be sprayed with gelcoat in the desired color of the part, then layers of fiberglass are built up to the desired thickness. Once complete, wedges are used to separate the part from the mold. If you have not tried this before, we suggest practicing on something of low value. Certainly, do not go straight to the original piece you are trying to make - and is in doubt, leave it to the professionals. It will be way cheaper in the long run.
COMPOSITE DIRECTORY
LINKS
|
|||||||||||
|
This
website is Copyright
© 1999 & 2013 Max Energy Ltd. The name Solar Navigator are
the bluebird
logo
|
|||||||||||


